Zooming
Zoom markers dynamically focus on specific parts of your video by zooming in and out during playback. They’re especially useful for highlighting details and drawing attention to key interactions.
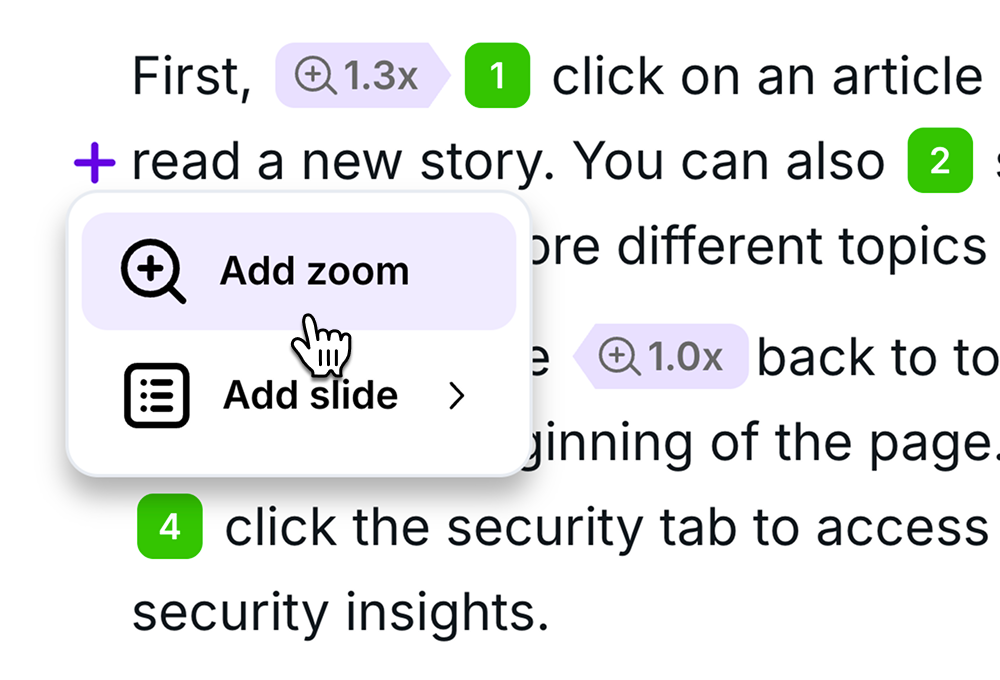
Adding a zoom marker
Section titled “Adding a zoom marker”- Navigate to the point in the Editor where you want the zoom effect to begin
- Click the + button on the left
- Select Add zoom
Setting zoom levels
Section titled “Setting zoom levels”Presets: Quickly apply consistent zoom levels with one click — 1.3x, 1.5x, or 2x.
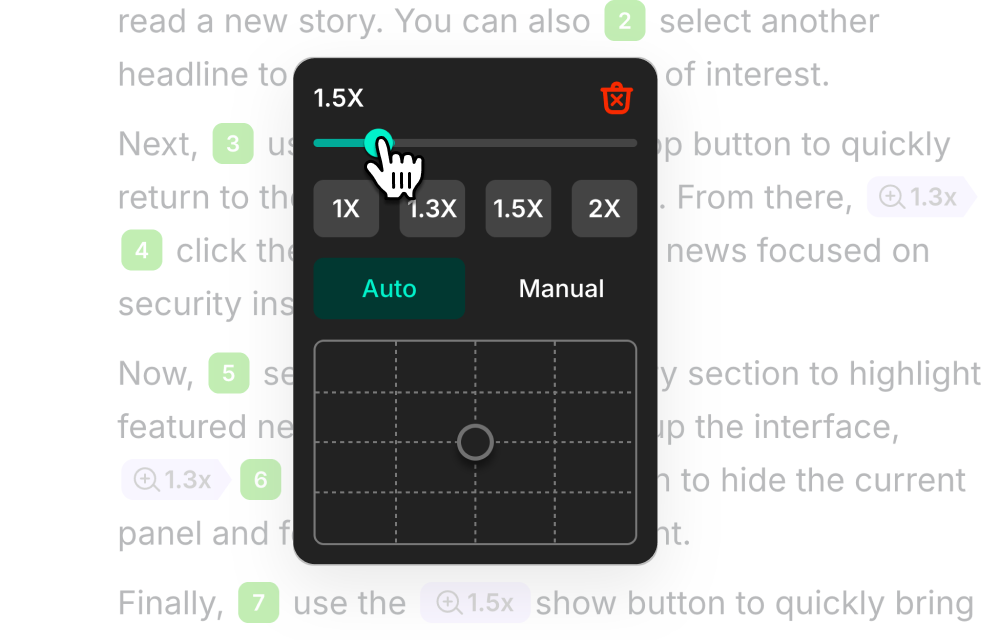
Custom zoom: Use the slider for precise control. The zoom level displays on the marker in real-time.
Zoom out: Add a Zoom marker and set it to 1x to return to the normal view.
Moving zoom markers
Section titled “Moving zoom markers”Drag zoom markers along the script timeline to adjust their timing. This lets you fine-tune when zoom effects occur to match your narration or visual cues.
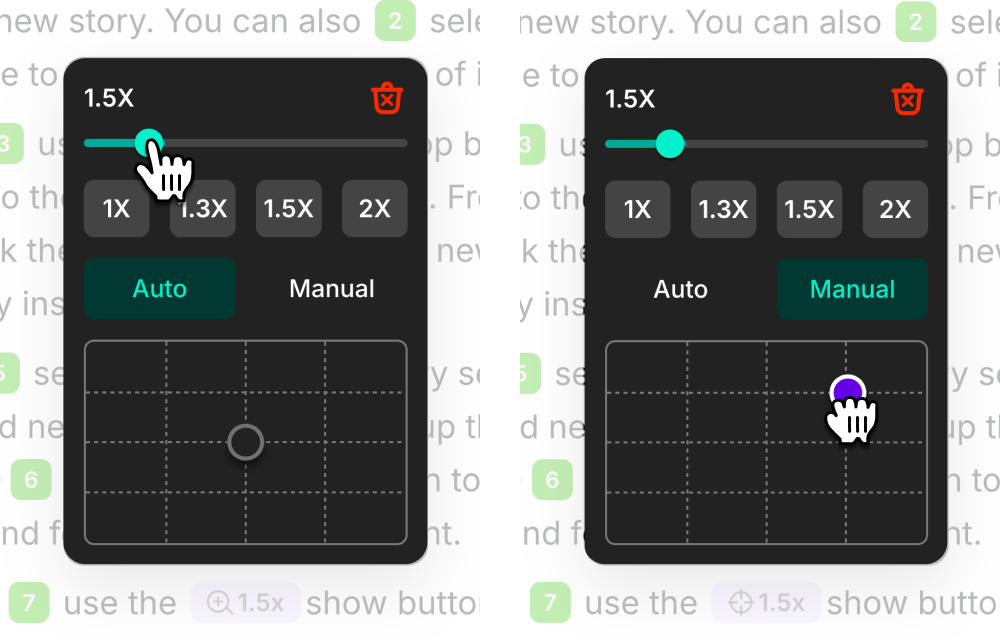
Auto vs. Manual zoom target
Section titled “Auto vs. Manual zoom target”By default, zoom automatically follows mouse movements, clicks, and typing. If you need to control exactly which part of the screen is zoomed:
- Click Manual in the zoom window
- Drag the purple dot to set the zoom focus area
- To return to automatic behavior, select Auto
Removing zoom markers
Section titled “Removing zoom markers”Delete a zoom marker by:
- Selecting it in the script and pressing Backspace
- Or clicking the red trash icon in the zoom popup
- Use zoom markers to guide your audience’s attention to important details they might otherwise miss
- Pair zoom with Highlights for maximum emphasis
- Keep zoom levels consistent within a section — jumping between very different zoom levels can feel jarring
- For UI tutorials, 1.5x–2x zoom on buttons and menus works well
Next steps
Section titled “Next steps”- Cursor Effects — Customize cursor appearance and movement
- Highlights — Spotlight specific areas of the screen
- Editor Overview — Back to the editor tour