Cut & Trim
Mistakes happen during recording — pauses, wrong clicks, loading screens. The Cut Tool lets you remove unwanted sections without re-recording, and Smart Auto-Cut handles the most common issues automatically.
Smart Auto-Cut
Section titled “Smart Auto-Cut”When you create a new project, Tutorial AI prompts you to apply automatic enhancements.
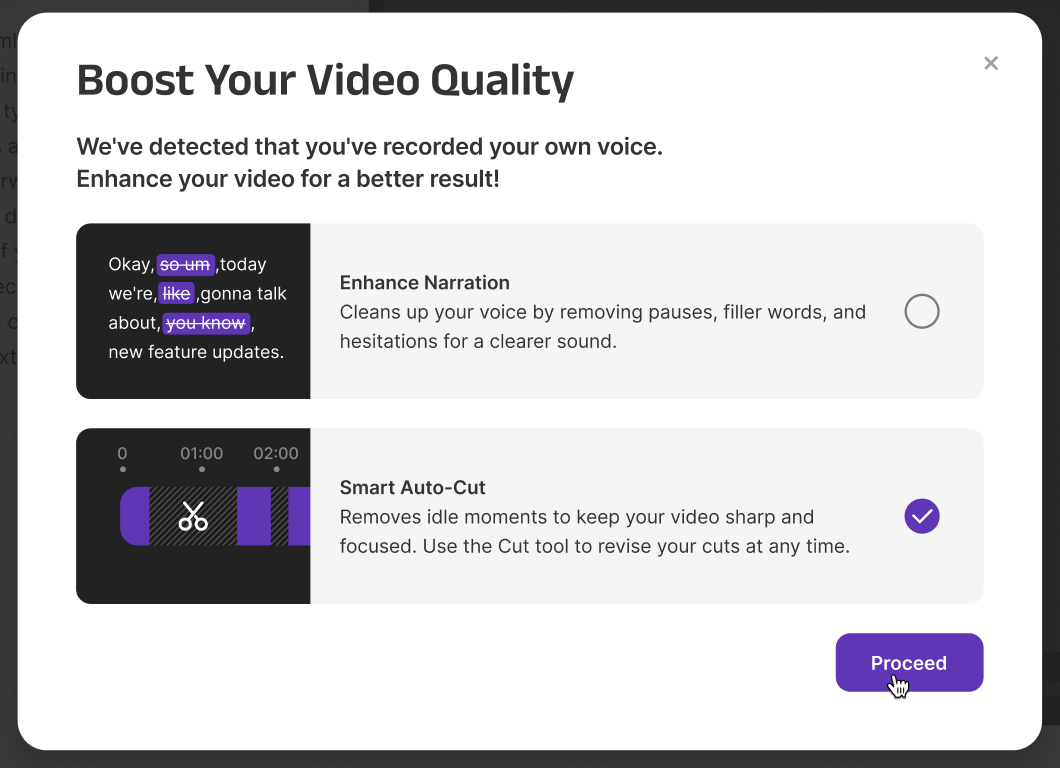
Smart Auto-Cut is enabled by default. It analyzes your recording and automatically:
- Trims sections where the mouse is idle
- Removes loading screens and pauses
- Eliminates dead space where nothing happens
This creates a smoother, more natural flow without manual effort. For best results, start with Auto-Cut and then fine-tune with manual cuts.
Manual Cut Tool
Section titled “Manual Cut Tool”For precise control, use the Cut Tool to remove specific sections:
Step 1: Open the Cut Tool
Section titled “Step 1: Open the Cut Tool”- Navigate to the part of your video where you want to make edits
- Click the Cut icon in the toolbar
- A detailed timeline editor appears
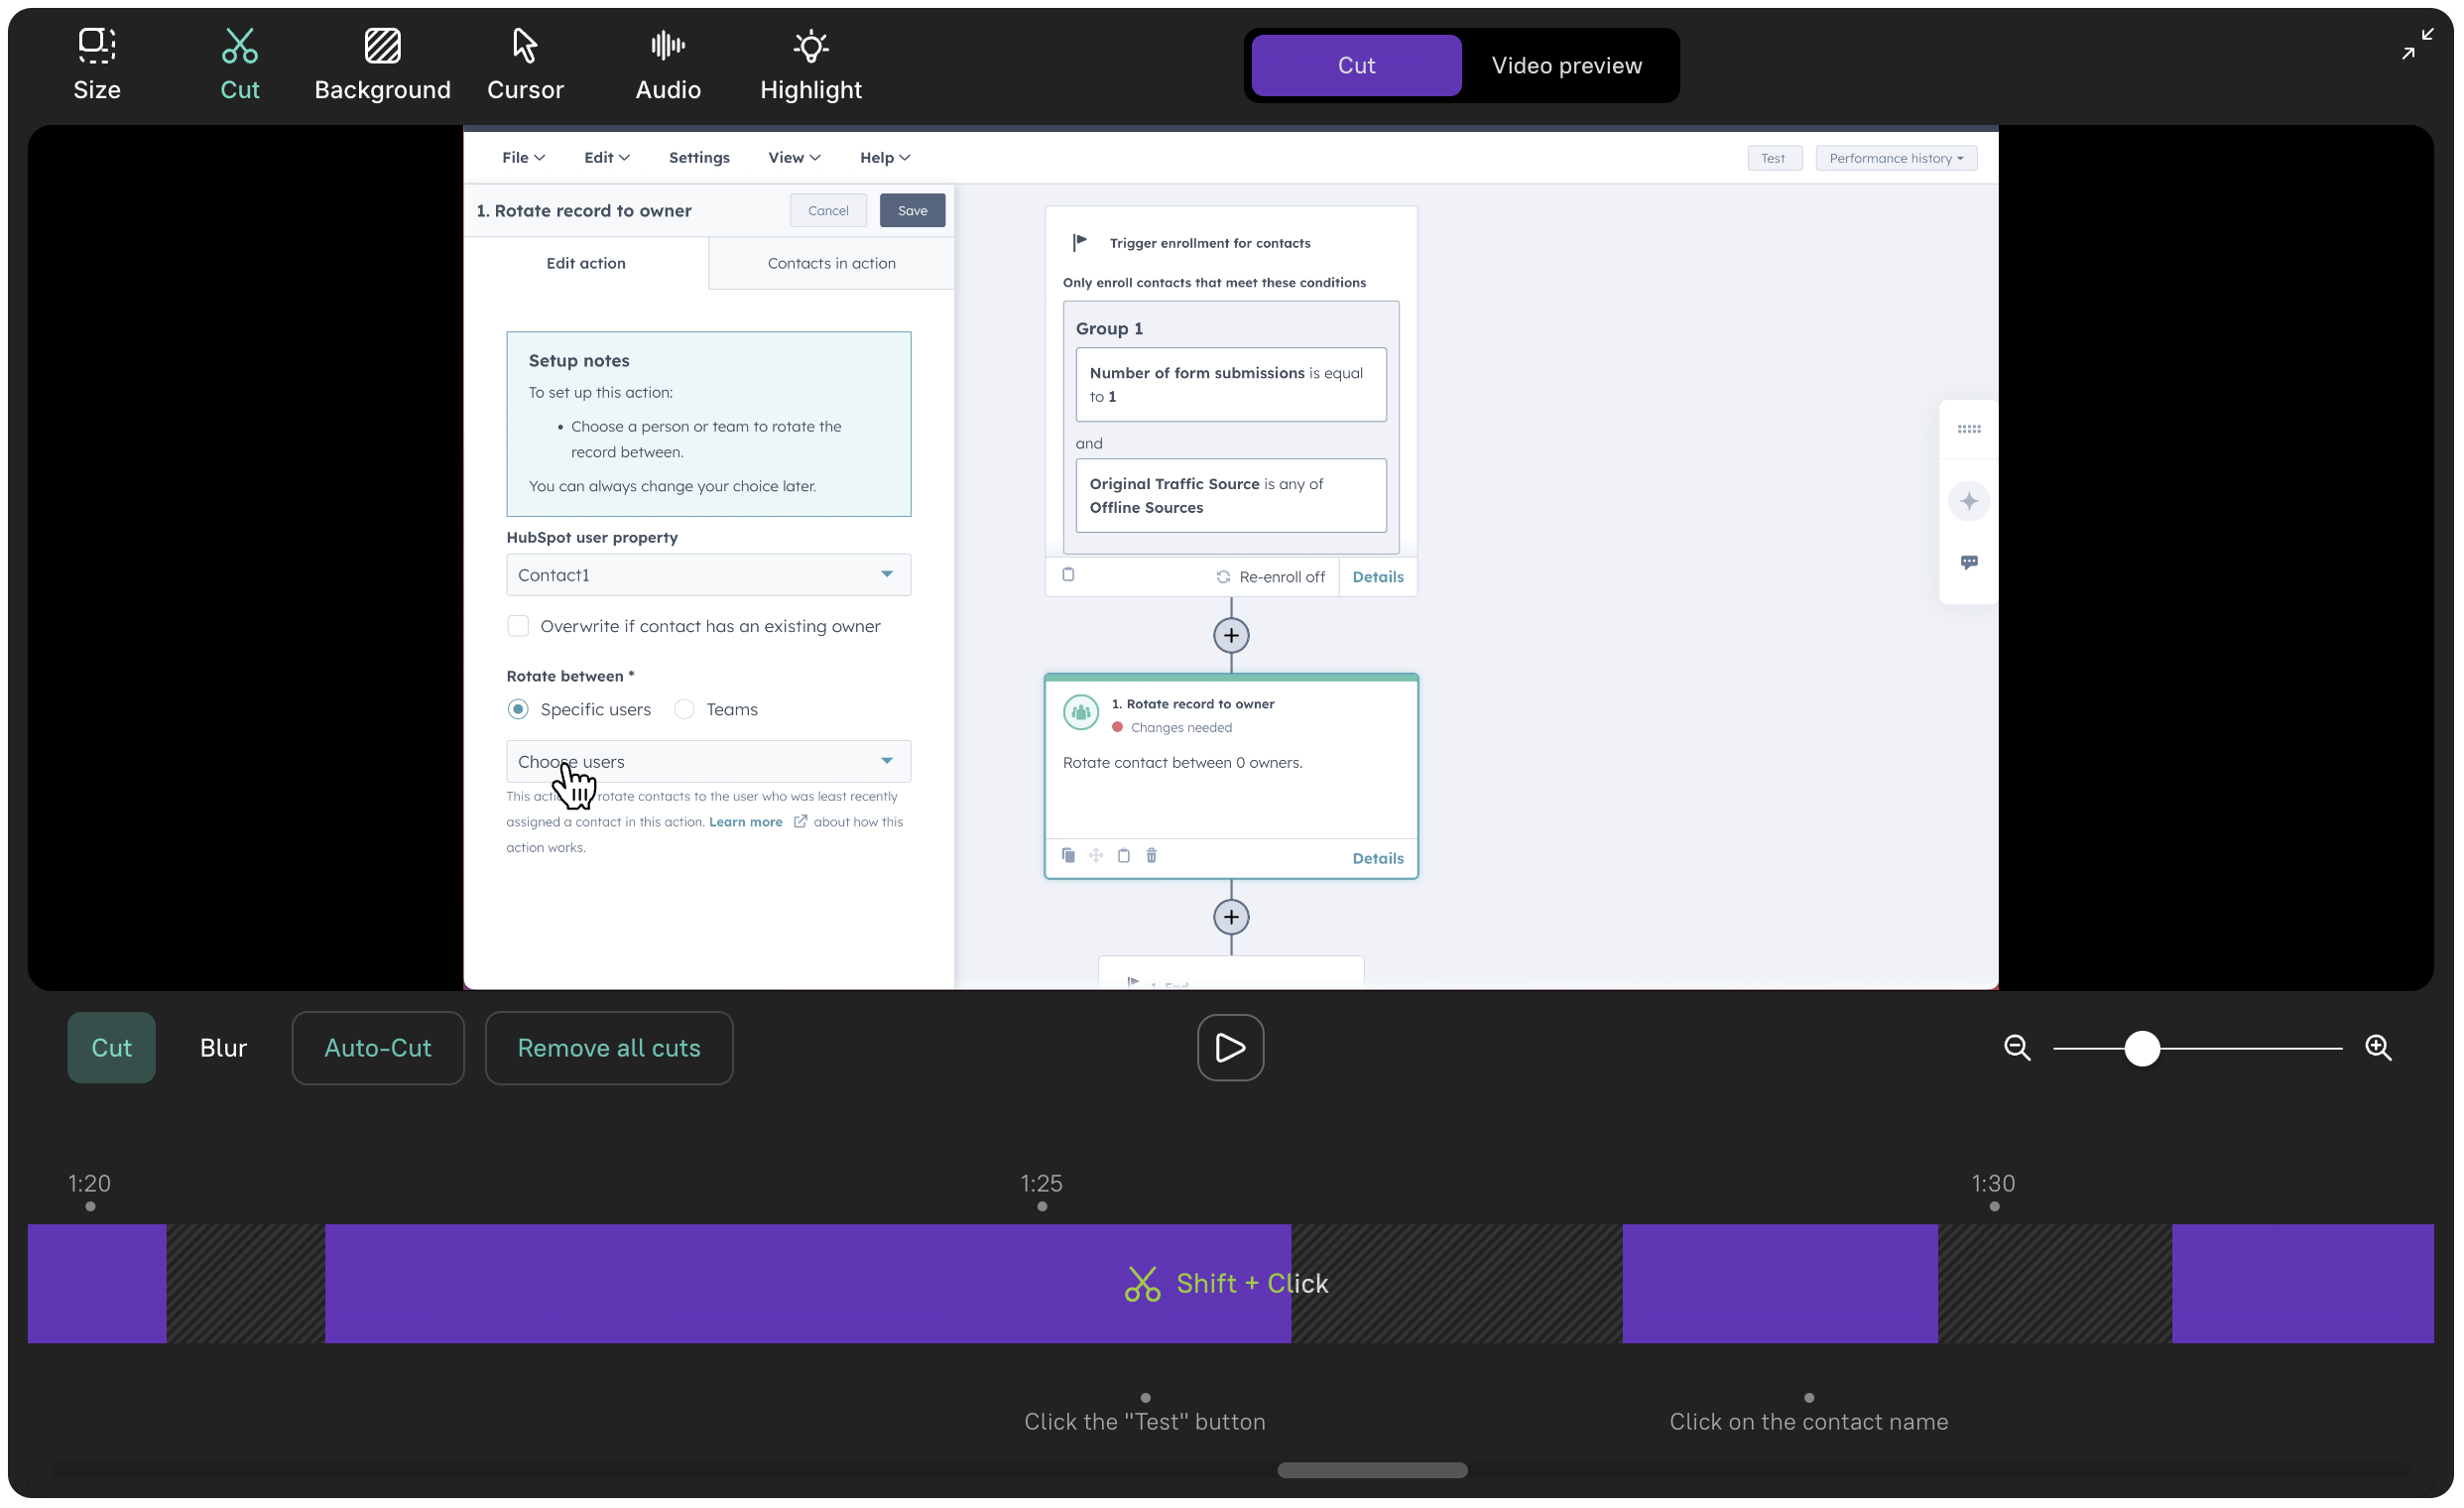
Step 2: Zoom in for precision
Section titled “Step 2: Zoom in for precision”- Use the zoom slider or pinch-zoom gesture (on touch devices) to get a closer look at your timeline
- Swipe to move your timeline left or right
- This helps you edit smaller, more precise segments

Step 3: Remove unwanted segments
Section titled “Step 3: Remove unwanted segments”- Position your cursor at the starting point of the segment you want to remove
- Press Shift + Click to mark the beginning of the cut
- Adjust the boundaries of the cut area by dragging the edges
Step 4: Preview your edits
Section titled “Step 4: Preview your edits”Press Space (or use the play button) on the timeline to preview how your video looks with the sections removed.
Step 5: Complete the edit
Section titled “Step 5: Complete the edit”Your changes are saved automatically. Exit the Cut Tool or click on Video Preview to finalize.
Recommended workflow
Section titled “Recommended workflow”- Start with Smart Auto-Cut — let AI handle idle time, pauses, and loading screens
- Review the result — play through the video to check for remaining issues
- Fine-tune with the Cut Tool — manually trim anything Auto-Cut missed
- Preview — always preview before finalizing
Next steps
Section titled “Next steps”- Slides — Add intro, outro, and chapter slides
- Blur — Hide sensitive data that wasn’t cut
- Editor Overview — Back to the editor tour