Video Basics
Every Tutorial AI video starts with a screen recording and ends with a polished, narrated tutorial. This guide covers the full workflow and introduces the editor.
The video creation flow
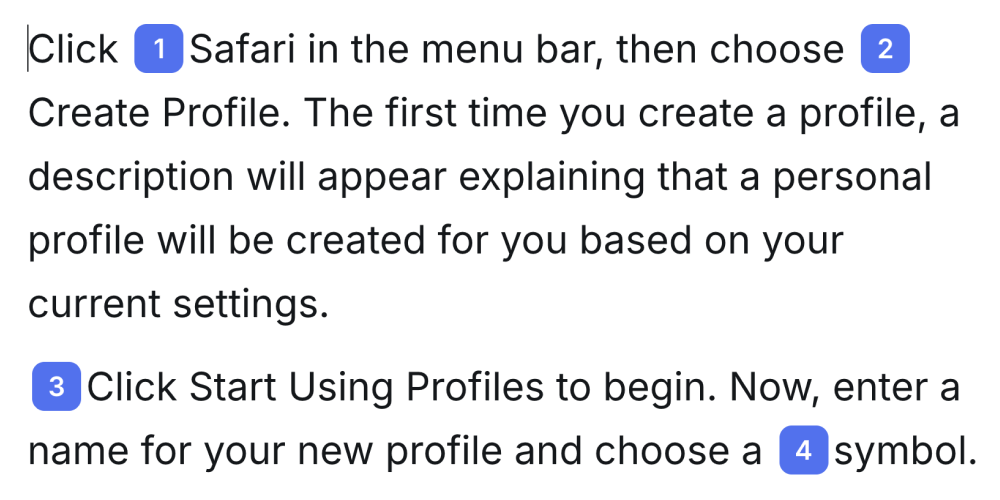
Section titled “The video creation flow”- Record — Capture your screen with the Desktop App or Chrome Extension
- Script — AI analyzes your recording and generates a narration script. If you spoke while recording, AI transcribes and refines your words.
- Voice — AI narrates the script with a natural-sounding voice in your chosen language
- Effects — Smart zoom, cursor highlighting, and transitions are applied automatically
- Review — Edit the script (the video updates to match), adjust effects, add slides
- Publish — Export, share, or embed your finished video
The editor
Section titled “The editor”The editor uses a script-based approach — you edit text, not a timeline. When you change a word in the script, the voiceover and video timing update automatically.
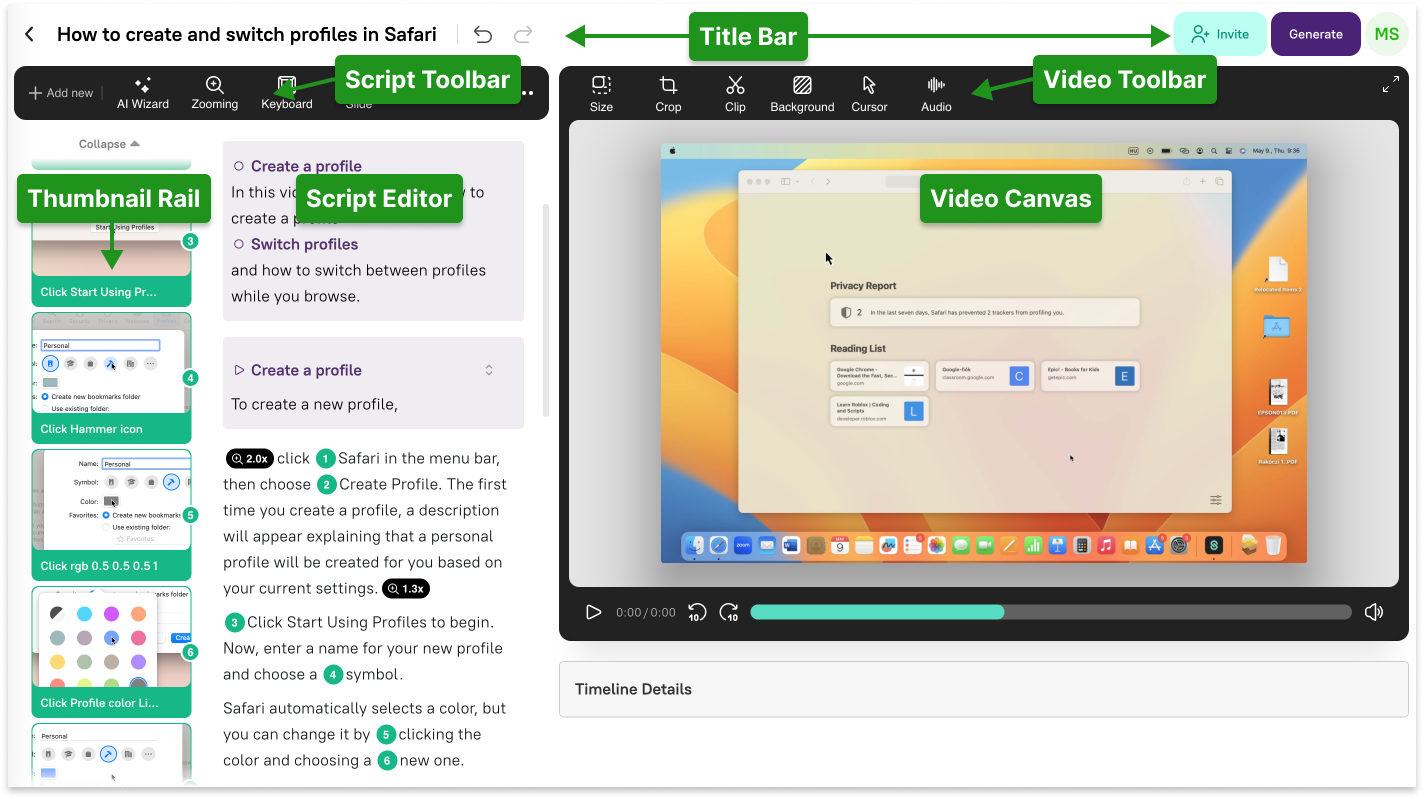
Key areas of the editor:
- Script Editor — Your narration text, where you write and edit the script that replaces a traditional video timeline. Drag and drop Sync Markers into your script to align narration with specific video frames.
- Video Canvas — Live preview of the finished video. Adjust format, backgrounds, padding, shadows, and cursor effects here.
- Editor Toolbar — Access zoom markers, keyboard shortcut annotations, and slide insertion tools.
- Title Bar — Name your project, manage workspace access, and generate the final video.
- Sync Marker Thumbnail Rail — Navigate through key scenes of your recording, similar to slides in a presentation. Sync Markers are created automatically when you click on items while recording.
Sync Markers
Section titled “Sync Markers”Sync Markers are timestamps linking specific words in your script to specific frames in your video. They’re generated automatically by the Recorder App when you click on screen elements.
When you drag a Sync Marker into the script, the system synchronizes that word with that video frame. The video automatically pauses or speeds up to keep narration and visuals aligned. Learn more in Script Editing.
Navigating your video
Section titled “Navigating your video”Tutorial AI offers three ways to navigate through your video:
- Click in the script — Jump directly to the video segment corresponding to that text
- Click a thumbnail — Use the Thumbnail Rail to jump to key frames
- Use the progress bar — Scrub through the video timeline for quick review
What makes it different
Section titled “What makes it different”Unlike traditional video editors that require timeline editing, Tutorial AI lets you edit your tutorial like a document. Subject matter experts — not video specialists — can create professional content in minutes. The script is the single source of truth: edit it, and everything else updates automatically.
Next steps
Section titled “Next steps”- Quickstart — Create your first video in 5 minutes
- Article Basics — Generate written documentation from the same recording
- Edit Like a Doc — Deep dive into script-based editing
- Editor Overview — Full tour of the editor interface