Edit Like a Doc
Tutorial AI lets you edit your video as easily as editing a text document. Instead of working with a timeline, you edit a narration script — and the video updates automatically.
Main concept
Section titled “Main concept”Think of the narration script as a separate, easily editable audio track that runs beneath your video recording. Every time you edit the script, your AI narration is automatically synchronized with your video content.
What sets Tutorial AI apart is its ability to automatically divide the audio into smaller segments and align them perfectly with the video, using Sync Markers placed in the script as a guide.
Sync Markers
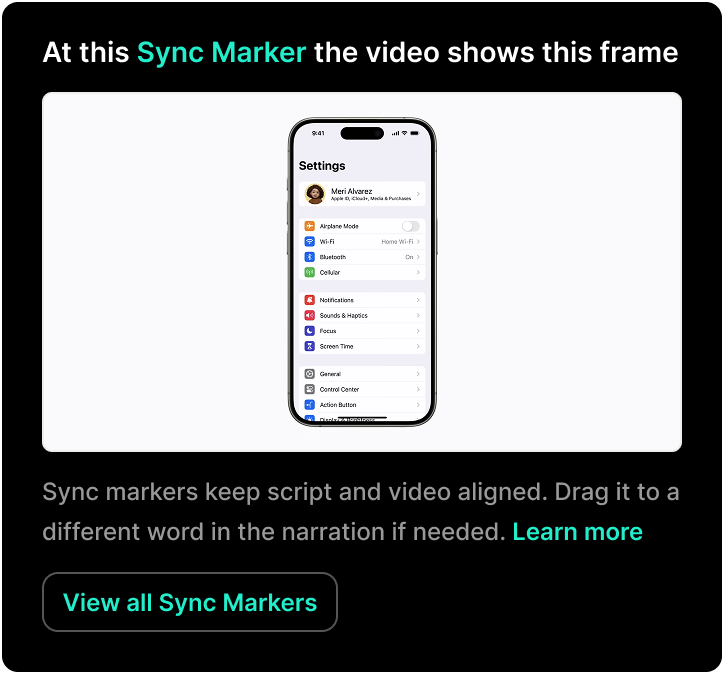
Section titled “Sync Markers”Sync Markers correspond to specific frames in the video recording and are generated automatically by the Recorder App.
By dragging and dropping a Sync Marker into the narration script, you tell the system to synchronize a specific word in the narration with a specific frame in the video. This ensures that the visual playback aligns precisely with the spoken content at that moment.
While this is simple with a single sync marker, it gets more complex as you add multiple sync markers. If there’s too much audio for a shorter video section, the video will pause to fit the audio. If there’s too much video for a shorter audio section, the video will speed up. You don’t need to worry about this — everything is handled automatically.
How the system works behind the scenes
Section titled “How the system works behind the scenes”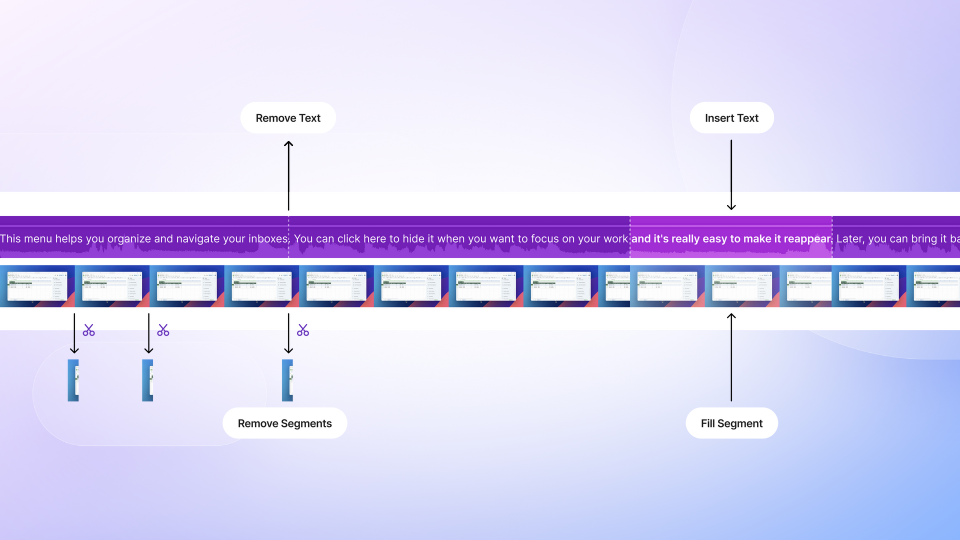
How to position a Sync Marker
Section titled “How to position a Sync Marker”You can reposition Sync Markers by dragging them within the narration script and dropping them onto a specific word.
The system automatically enforces ascending order for Sync Markers. While dragging, any part of the script where the marker cannot be placed appears greyed out and inactive. This prevents placing markers out of sequence.
Deleting a Sync Marker
Section titled “Deleting a Sync Marker”In advanced scenarios, you may want to remove a Sync Marker from the script (though this is usually not necessary).
Option 1: Select the Sync Marker in the script and press Backspace.
Option 2:
- Open the Sync Marker panel
- Select the Sync Marker and click the three-dot menu next to its label
- Click “Unlink”
Re-inserting Sync Markers
Section titled “Re-inserting Sync Markers”Deleting a Sync Marker from the script does not remove it from the system. You can re-insert it at any time:
- Open the Sync Markers panel
- Drag and drop the desired Sync Marker back into the script
Sync Marker labels
Section titled “Sync Marker labels”Sync Markers are automatically generated by the Recorder App. The system generates a short descriptive label under each marker to help you identify what happened when the thumbnail was captured.
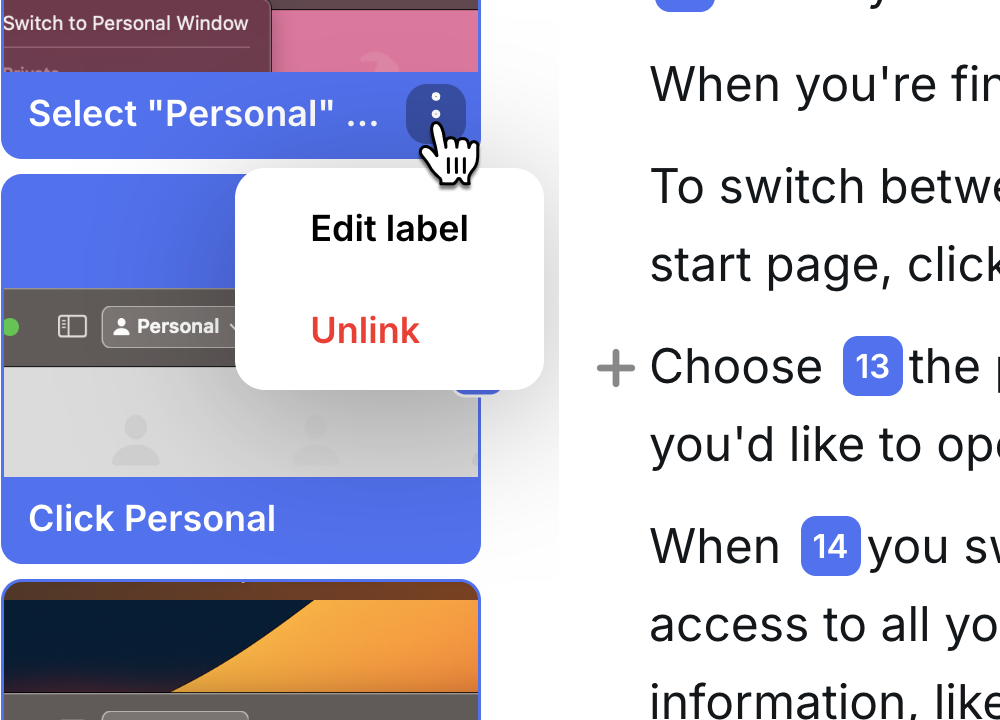
- To edit a label: hover over the three-dot menu next to the label and select “Edit label”
- To remove a label: choose Unlink or delete the Sync Marker from the script with Backspace
Next steps
Section titled “Next steps”- Cut & Trim — Remove unwanted sections from your recording
- Slides — Add intro, outro, and chapter slides
- Ask AI — Use AI to polish and restructure your script