Captions: Closed vs. Open
Add captions via upload (toggleable, multi-language) or burn-in (always on); includes pros/cons and when to use each.
Captions are essential for narrated tutorials. You can add them in two ways:
A) Closed captions
Pros
- Viewers can toggle captions on/off and change language.
- Often searchable and indexable.
Cons
- Most players show captions off by default.
- In muted/autoplay embeds, viewers may miss that audio is available.
- Styling varies by platform; requires a host that supports caption files.
How to
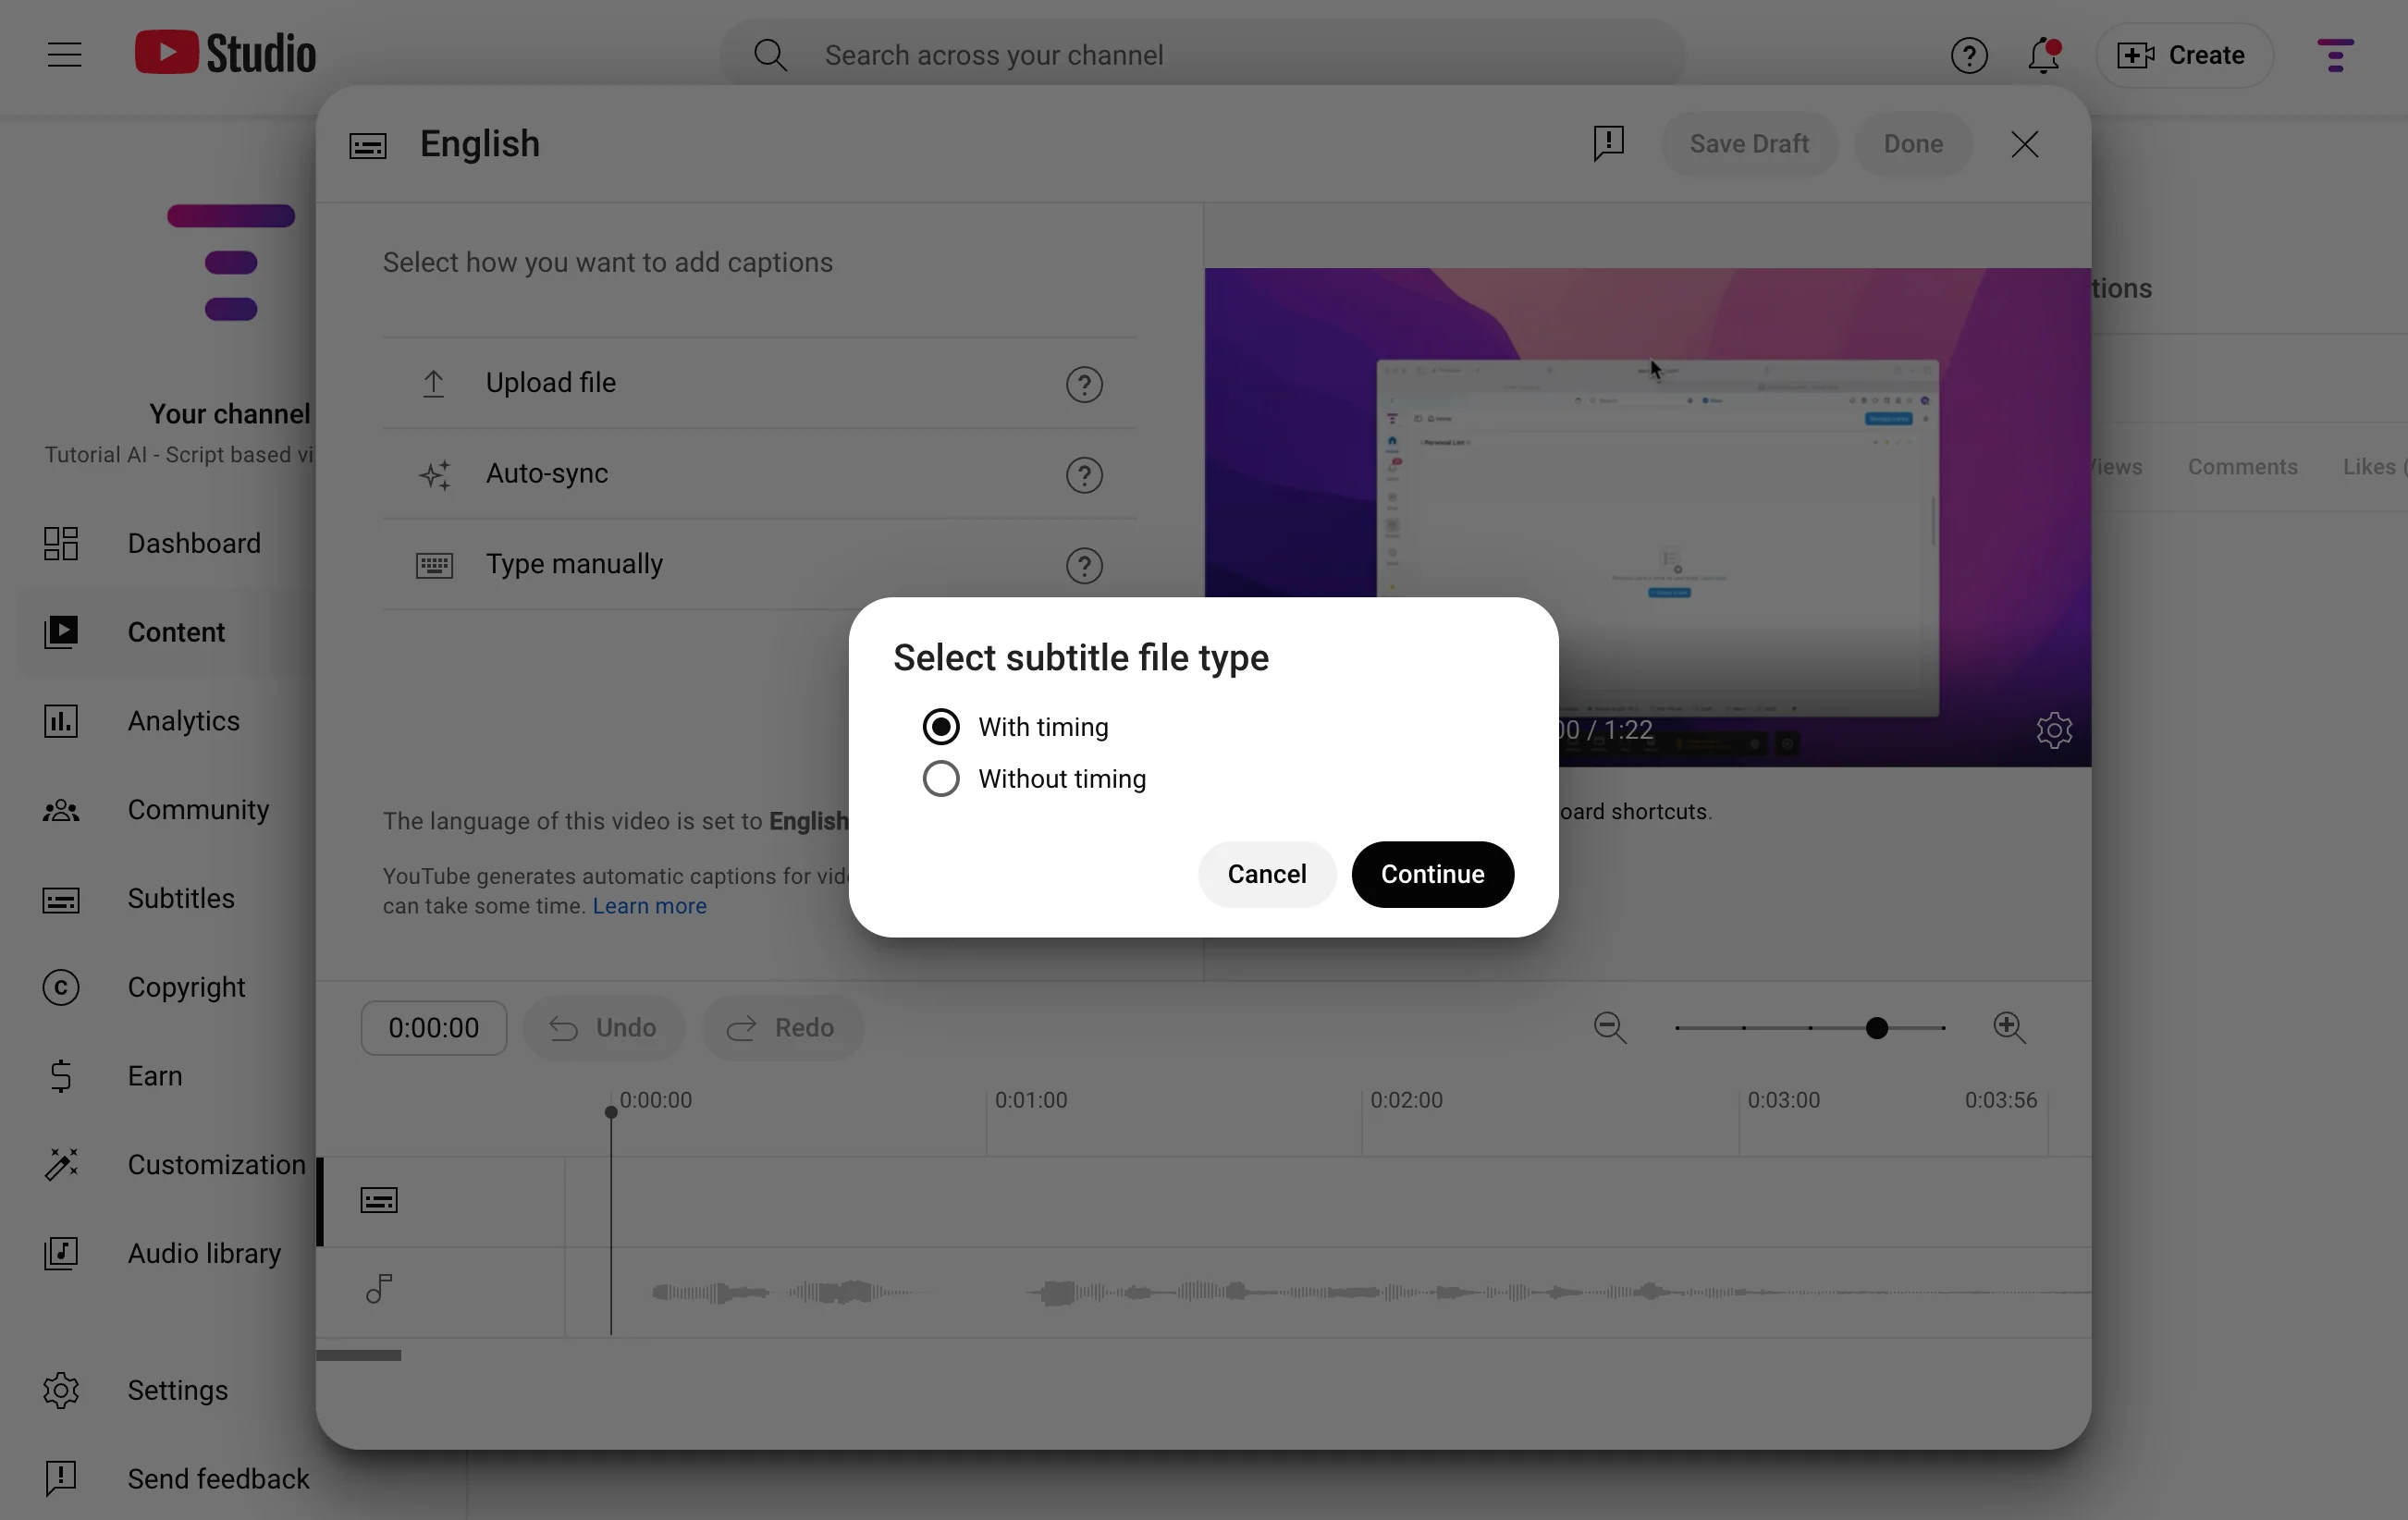
- Generate your video, then go to Export → download a caption file (.srt, .sbv or .vtt).
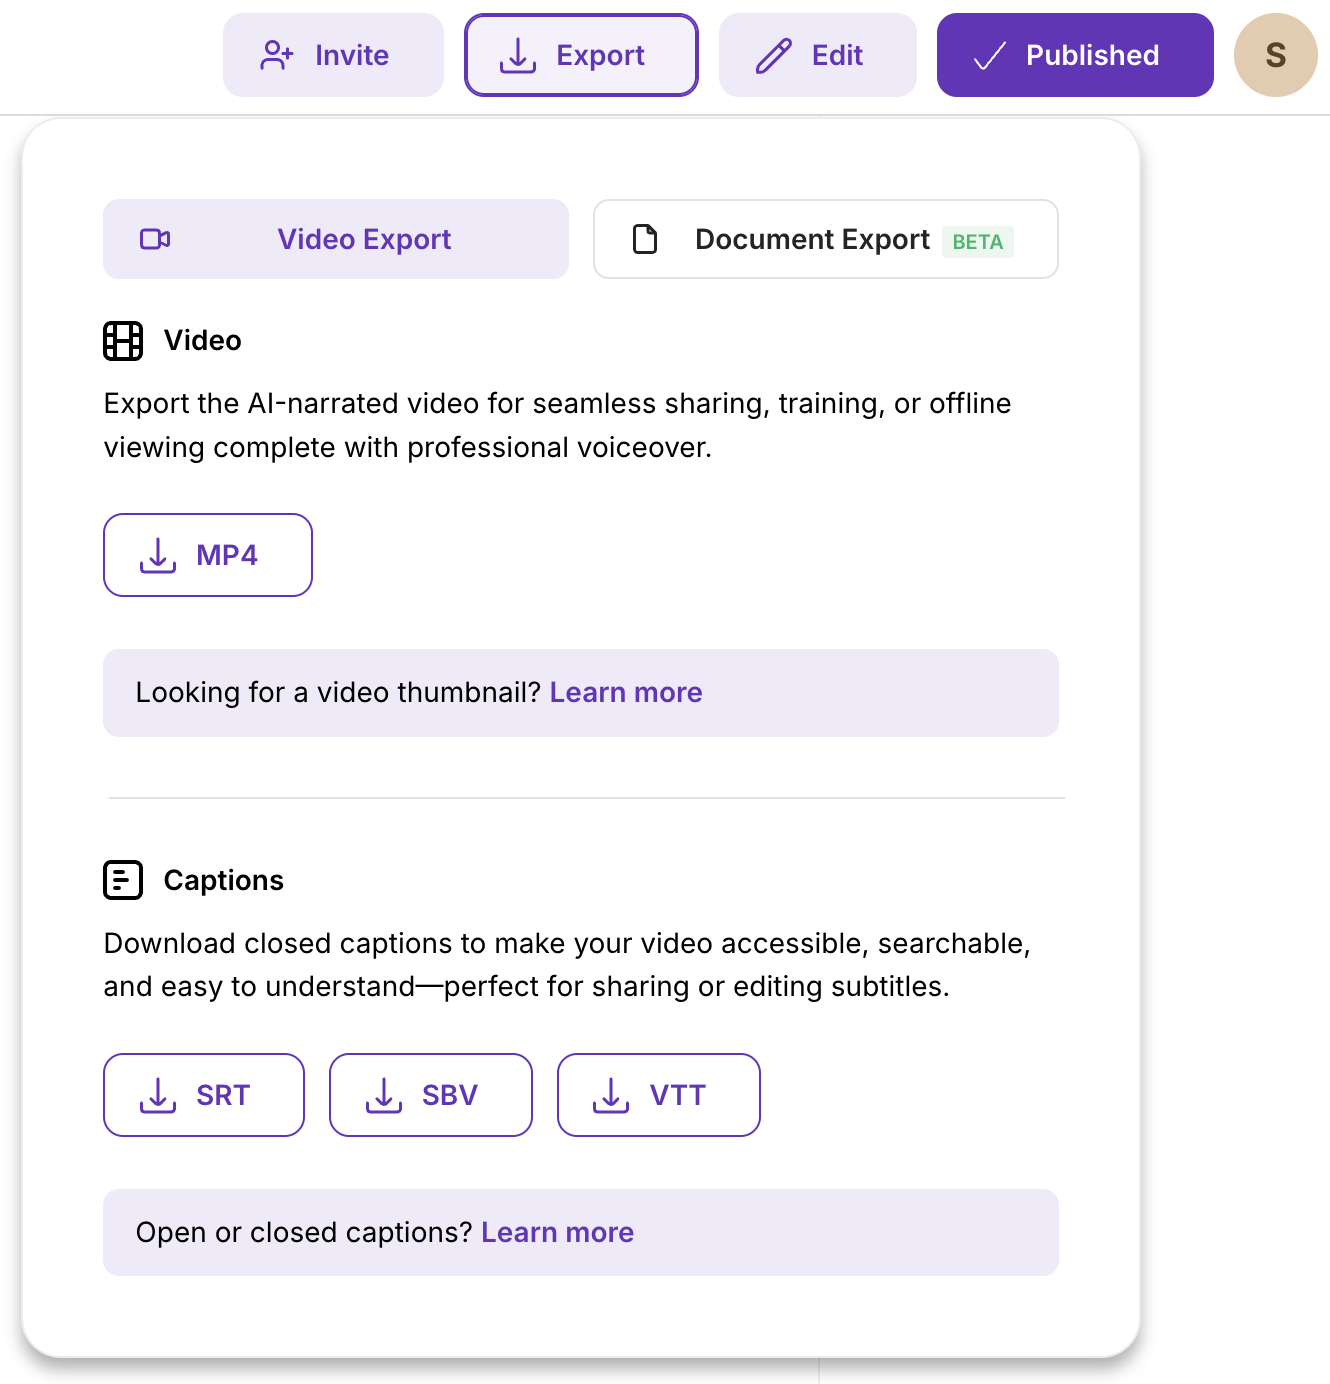
- Upload the file to your video host (YouTube, Vimeo, LMS, etc.). Make sure you select the ‘With timing’ option.
B) Open (burned-in) captions
Pros
- Always visible — great for feeds where sound is off by default (LinkedIn, X).
- Consistent look that matches your brand.
- Works everywhere, even where caption files aren’t supported.
Cons
- Not toggleable.
- May cover on-screen UI.
- If the player also shows closed captions, you’ll get duplicate text and viewers will need to turn off closed captions.
How to
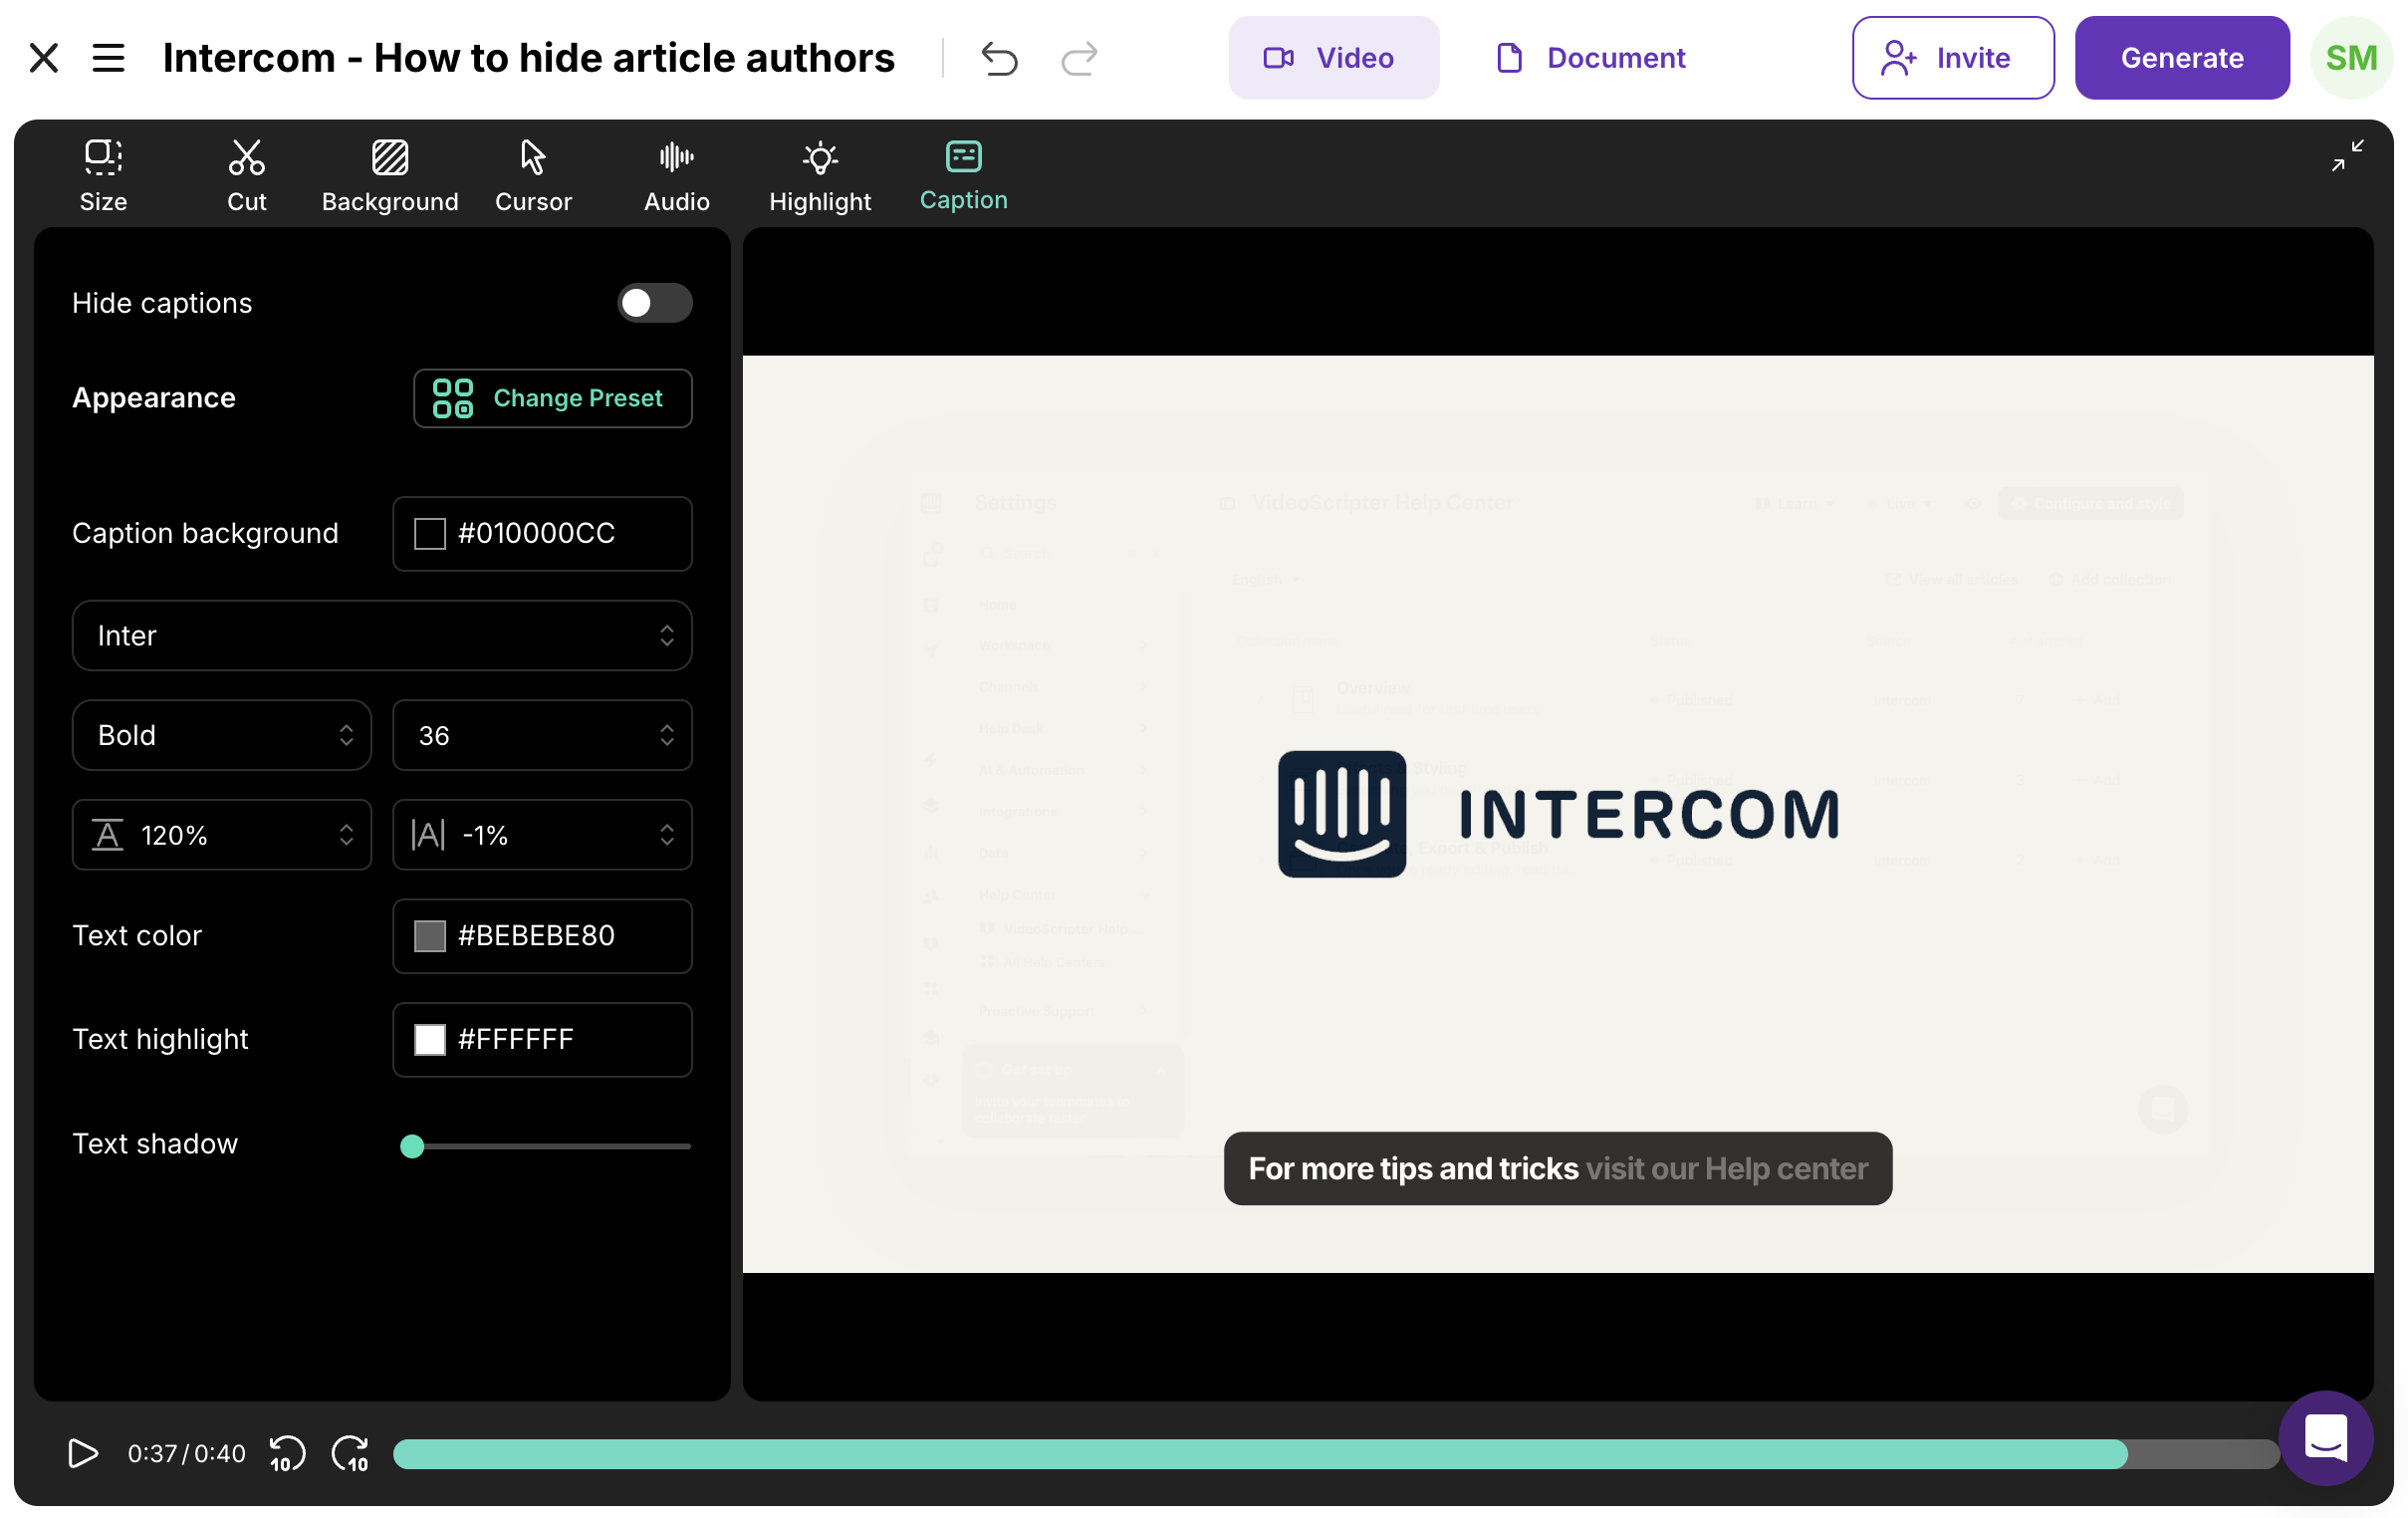
- Open the Captions tab in the video toolbar and configure your caption styling.
Quick guidance
- Social feeds / muted autoplay: Burn-in.
- YouTube, LMS, multi-language: Upload caption files.
- Avoid enabling both at once to prevent duplicate captions.